This weekend, as I said in the last post, I did a recipe out of four different canning books. My second recipe was one that every time I looked at the picture I kept thinking “What would I use that for”. Certainly a question that many of my followers have after I have made some pretty crazy things.
The Peppered Plum Jam from the Better Homes and Garden Can It! canning book has a picture of a deep purple jam with a basting brush lathered with its contents ready to smear a canvas with its cracked pepper heat. Since I have made plums into a marinade sauce before the one thing that tripped me up was the black pepper. How was that going to marry with the sweetness of the black plums I was going to use?
The answer was amazing! This recipe was simple with basic “jammin” ingredients; plums, lemon juice, sugar, pectin, and freshly ground black pepper. The taste is probably one of my new favorites because it has the sweetness of the plums and the residual heat of the pepper without one overshadowing the other. I used the plums with the dark purple flesh this time and maybe that might have had an affect on the outcome. Either way this is a great recipe and one that will be perfect as a marinade spread on chicken or pork several hours before going on the barbecue.
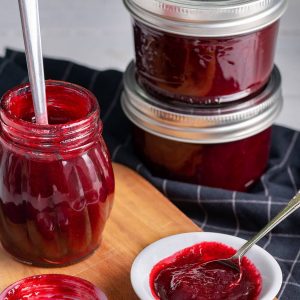
Peppered Plum Jam
Ingredients
- 4 cups plums (I used black plums)
- 1/2 cup water
- 2 cups sugar
- 2 T. bottled lemon juice
- 2 T. Ball Flex batch pectin
- 2 t. freshly ground black pepper
Instructions
- Pit and finely chop plums, do not peel. In a 5 or 6 quart heavy pot combine plums and the water, reduce heat. You will add the water because plums are easily burned in the bottom of the pot. Simmer, covered for 5 minutes.
- Add sugar to plums and bring to a full rolling boil, stirring constantly for another 5 minutes. You can break down the plum at this point by using a potato masher. (Immersion blender will be a mess!)
- Add bottled lemon juice and once back at a boil add the pectin, stir and time for one minute boiling hard. Remove from heat and add the black pepper.
Filling the jars:
- On a dishtowel place your hot jars and using your funnel in each jar ladle the mixture into the jars leaving 1/4" headspace. Remove air bubbles and refill to the proper headspace if necessary.
- Taking a clean papertowel wet it with warm water and wipe the rims of the jars removing any food particles that would interfere with a good seal.
- Using your magic wand extract the lids from the hot water and place them on the now cleaned rims. Add your rings to the tops of each of the jars and turn to seal just "finger tight".
Processing:
- Make sure your rack is on the bottom of the canner and place the jars in the water bath making sure that the water covers each of the jars by 1 to 2 inches. Add hot water to the canner if it doesn't measure up.
- Cover the pot and turn up the heat under the canner and wait for the water to start boiling. Once the water has come to a boil start your timer for 10 minutes.
- When complete turn off the heat and remove the cover and let the jars sit for another few minutes.
- Remove the jars and place them back on the dishtowel in a place that they will sit overnight to cool. Do not touch or move them till the next morning.
Sealing:
- Some time in the next hour your jars will be making a "pinging" or "popping" noise. That is the glass cooling and the reaction of the lids being sucked into the jar for proper sealing. Some recipes may take overnight to seal. Check your lids and reprocess any jars that did not seal.
- Makes 4 half pints.



Leave a Reply