Cheese Part One : Soft, fresh cheeses:
These cheeses can be made very simply at home, so long as you have the cultures. Cultures can be found in plain yogurt and kefir grains. Kefir grains are cultures that you can grow in any type of milk but are alive and can turn milk, raw, cream, or half and half into a cheeses such as crème fraise, sour cream, and cream cheese. Because it is difficult to get these grains for many people I will skip talking about this for the next series.
For the yogurt cheese you are looking for a yogurt with live active cultures, and one without thickeners and stabilizers. Cheese is a live food, and only yogurt with active cultures
will make good cheese. And thickeners such as cornstarch, pectin and even gelatin, all relatively common ingredients in low-fat, or fruit-on-the-bottom yogurts, will prevent your yogurt from draining itself into cheese. The higher the fat content the yogurt the better the cheese. If you can find yogurt made from unhomogenized or raw milk, that’ll make a real treat.
The next thing you will need is something to hang the yogurt in so that it will drip away the live cultures or whey from the solids. Many canners know this type of work because of doing jelly, but you are going to need something with a finer mesh than a jelly bag. Muslin fabric is porous and great because you can wash the fabric and use it over and over. Another good choice is to invest in a “Do” rag. The long tails of the ties work great for hanging the yogurt over a bowl. A clean pillowcase or t-shirt though will work in a pinch.

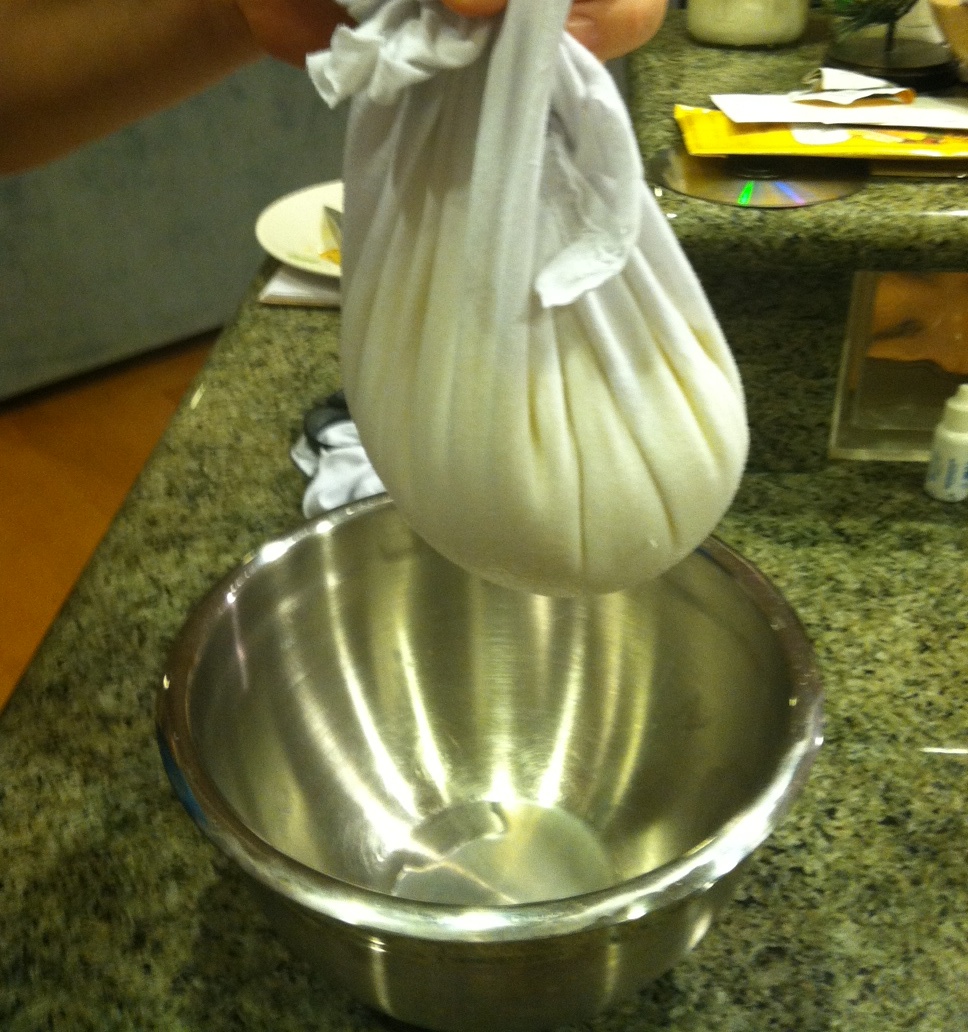
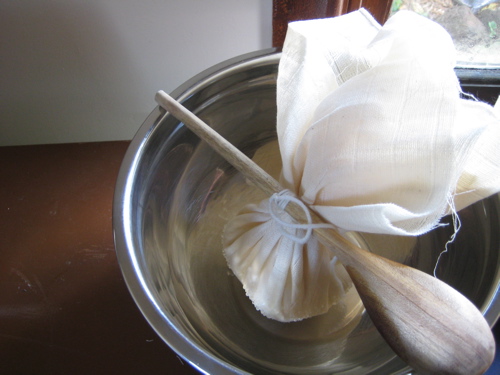
Rinse out the cloth well, then line a bowl with the fabric, t-shirt or cheesecloth. For cheesecloth fold it over itself if the weave is not tight to make a double layer if necessary. Empty the container of yogurt into the cheesecloth or fabric. There are many ways to tie it, but the two most popular are bring three of the four corners together to hold the yogurt. With the fourth corner, wrap it round the other three, and form a top-knot. The other is to bring all the corners together and tie them with twine. Wrap around a rolling pin or spoon handle and the whey will begin to drain and the yogurt remaining in the bag will thicken and until it turns to cheese.

The process does take some time, about 24 hours, so find a good place to hang it just leave a bowl underneath to catch the dripping whey. Don’t leave your cheese to hang in the fridge: it will taste like pickles and bacon and kale or whatever is in there.
Check up on your cheese as it drains. If you wait a full 24 hours, you’ll open the bag to find your yogurt cheese. Scooped out of the bag, it can be eaten right away. Or, if you’d like to keep it, mix in a teaspoon or so of salt, and let it hang again for another six hours. The salt will draw out moisture from the cheese and help it to drain more, and firm it up.
Since this cheese is fresh and not aged or dried it will not last long; it’s just not meant to be preserved. Eat it within a couple of days, or if you must, put it in your fridge and savour for a week. You can flavor your cheese by gently mixing in dried herbs or garlic for a savory cheese or leave it plain and drizzle honey for a great fruit cheese.
Some of you may have access to goat’s milk yogurt which is a great way to make a start of a soft goat’s milk cheese.
This recipe makes a great cheese that is almost completely unknown in North America. Our supermarkets don’t carry it because it must be eaten so fresh that the producers can’t get it to the stores fast enough and into the shoppers carts before it begins to separate and weep whey. Make it at home for a great cheese for the week or make a batch the night before going to a party where you have to bring something and be the hit of the party with your home made cheese!


Leave a Reply