After making Cha Cha Chutney last year I was and have been convinced that when you get the pot ready to ladle a chutney what you put in isn’t even close to what you will get out. You will find that time develops flavors that are amazing.
I have passed over “Simply Delicious Cherry Chutney”plenty of times as I looked through the The Ball Complete Book of Home Preserving. Today the canning group did an adaptation of this recipe as one of three recipes we made. The book says that this recipe is a “ideal partner for pork and makes a fabulous finish for a cheese tray.” Enjoy this great recipe!
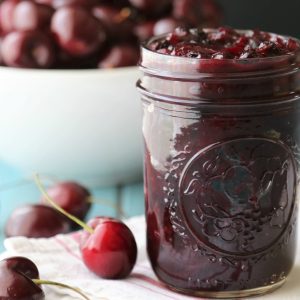
Cherry Chutney
Ingredients
- 10 cups frozen red tart or sweet black cherries – partial thawed, coarsely chopped
- 2 pc. large apples, cored, peeled and chopped
- 1 1/2 cups chopped sweet Vidalia or red onion
- 2 large cloves garlic, finely chopped
- 1/2 tsp salt
- 4 1/2 tsp whole allspice
- 1 stick cinnamon, 6 inches, broken in half
- 1 cup vinegar (wine, cider or white vinegar)
- 1 cup lightly packed brown sugar
- 1 1/2 cups dried cranberries
Instructions
Pre-Prep:
- Tie cinnamon and allspice in a square of cheesecloth or in a spice ball.
Preparation:
- Prepare 8 half pint jars, lids, and rings. Sterilize the jars and keep them in the hot water till its time for processing. Make sure to fill your water bath canner and get the water to a simmer.
Cooking:
- In a stainless steel or enameled dutch combine cherries, apples, onions, vinegar, garlic, salt and spice bag. Bring to a boil over medium heat and boil hard stirring often for 20 minutes.
- Add brown sugar and stir in. Reduce heat and boil gently, stirring often until thick enough to mount on a spoon, for another 20 minutes. Add cranberries bring back to a boil then remove from heat. Remove spice bag.
Filling the jars:
- On a dishtowel place your hot jars and using your funnel in each jar ladle the mixture into the jars leaving 1/2” headspace. Remove air bubbles and refill to the proper headspace if necessary.
- Taking a clean papertowel wet it with warm water and wipe the rims of the jars removing any food particles that would interfere with a good seal.
- Using your magic wand extract the lids from the hot water and place them on the now cleaned rims. Add your rings to the tops of each of the jars and turn to seal just "finger tight".
Processing:
- Make sure your rack is on the bottom of the canner and place the jars in the water bath making sure that the water covers each of the jars by 1 to 2 inches. Add hot water to the canner if it doesn't measure up.
- Cover the pot and turn up the heat under the canner and wait for the water to start boiling. Once the water has come to a boil start your timer for 10 minutes.
- When complete turn off the heat and remove the cover and let the jars sit for another few minutes.
- Remove the jars and place them back on the dishtowel in a place that they will sit overnight to cool. Do not touch or move them till the next morning.
Sealing:
- Some time in the next hour your jars will be making a "pinging" or "popping" noise. That is the glass cooling and the reaction of the lids being sucked into the jar for proper sealing. Some recipes may take overnight to seal. Check your lids and reprocess any jars that did not seal.



Leave a Reply